Category Tricks, Tips, or Hacks

iPhone 2.2 Jailbreakers, free up space from previous Jailbreaks!

Attention: This content is 15 years old. Please keep its age in mind while reading as its contents may now be outdated or inaccurate.

I noticed that after my upgrade and reinstalling my apps I was missing a huge chunk of my free space.
I got to investigating and noticed that every folder in /private/var/stash was duplicated!  It appeared as though it still had my old folder from the first upgrade on there… as well as the newly made folders.
Some quick googling turned up this nugget of information:

I believe BigBoss is referring mostly to the extra directories under /private/var/stash. Each time Cydia runs “for the first time”, it moves and symlinks some directories there to ensure that the root partition doesn’t run out of space. If that was over your head, stop reading, and follow his instructions above.

Still with me? Okay, so first off it’s these directories that are showing as “Other” in iTunes. That’s fine, and it’s totally normal for there to be a decent amount of space showing that way.

The problem comes when Cydia runs again on the “Upgraded” device, and goes and creates all these directories over again, resulting in double the space consumed (though I personally didn’t see quite as much as 500mb).

If you are comfortable poking around *nix, the cleanup you asked about is generally straightforward. Just stroll over to /private/var/stash, do an ls -al and delete the older of any duplicate directories (Applications.23981, Applications.sidufh, etc.). If they have the same date, you’ll need to find for the symlink and see which one’s current.

As always, backup first, and if you brick your device, go back and follow BigBoss’ instructions above. 😛

So I deleted the old duplicate folders that didn’t need to be there any more and got back over 800mb of free space!!

I’ve some screen shots so you get what I’m talking about…
Read More

So Long iGoogle!

Attention: This content is 16 years old. Please keep its age in mind while reading as its contents may now be outdated or inaccurate.

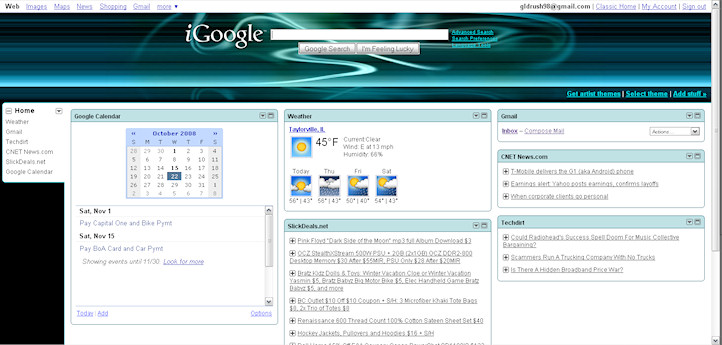
It’s been almost a week now and iGoogle still has no option of reverting.  It is still loading slow and the new way their “widgets” load is fucking terrible.

As of today I am changing my home page on all of my machines at work and home.  I refuse to use a home page that looks and functions like crap.

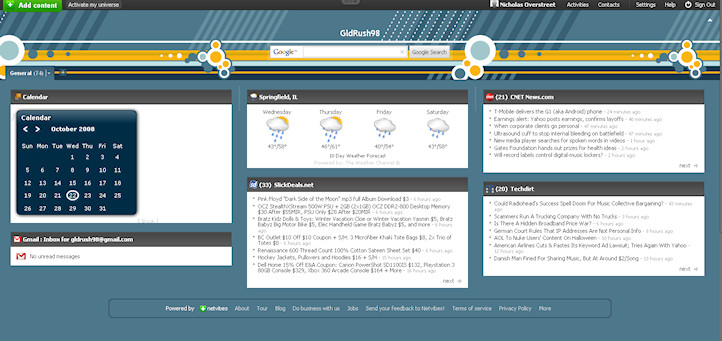
My new home page, which it seems a lot of iGoogler’s are fleeing to, is Netvibes.  A very clean, organized, and functional ajax home page.  I have it set up exactly like my iGoogle page was, matching feeds in the same place and it even has a Gmail widget so I can still keep an easy eye on Gmail!

If you used iGoogle and are upset with their changes, leave them.  Leave them now and be happy with your new home page.  I know I am!

FAIL:

WIN:

Move that nasty EA Games folder out of Documents!

Attention: This content is 16 years old. Please keep its age in mind while reading as its contents may now be outdated or inaccurate.

My girlfriend loves The Sims 2.  Unfortunately she has to play it on my main computer because it’s also a gaming rig so it handles The Sims 2 with ease, where as her computer would stroke out.

Because of this The Sims 2 is installed on my computer.

I have my system setup with multiple hard drives, but for the sake of this article, we’ll say I have my C: which is where Windows and all it’s crap is installed, and I have a D: where I install all my games and keep the [legal] images for them and stuff.

Well The Sims 2, thanks to EA’s shitty programming, when installed to another location besides the C:, like the D:, even though it installs to d:\program files\ea games\the sims 2 it still feels the dire need to install files on you C: in your Documents folder!  Even more so, if you have every expansion pack and add on like we do that EA Games folder on your C: can balloon up to over 5gb!!!  This is incredibly frustrating because this is the EXACT reason why I install games to the D: I want to keep ridiculous amount of files OFF my much smaller C:

As far as I know, I am the first person that has come up with a way to move this folder-of-shit off of your C: and to any other location you please.

Read More

Follow up to “Open File – Security Warning”

Attention: This content is 16 years old. Please keep its age in mind while reading as its contents may now be outdated or inaccurate.

A month ago I posted on how to disable the annoying Open File- Security Warning dialog when opening files downloaded from the Internet.

At the end of the article I mentioned that there was a side effect in doing this…

The only side effect is that IE will have a warning bar at the top when you fire it up trying to scare you in to enabling it again.

And I come to you today with a way to disable this across both Business(Professional) and Home editions of XP and Vista

Fire up your trusty registry editor and go to:

HKLM\SOFTWARE\Policies\Microsoft\Internet Explorer\Security

Note that you may not have the Internet Explorer and Security keys under the Microsoft key.  You can create these your self, just be sure you remember the registry is all case sensitive.

Under the Security key create a new DWORD Value and name it DisableSecuritySettingsCheck and then set its value to 1

Now the next time your have to fire up that turd IE, you won’t be harassed by a silly warning message!

Vista/XP Annoyance – “Open File – Security Warning” (Caused by IE7)

Attention: This content is 16 years old. Please keep its age in mind while reading as its contents may now be outdated or inaccurate.

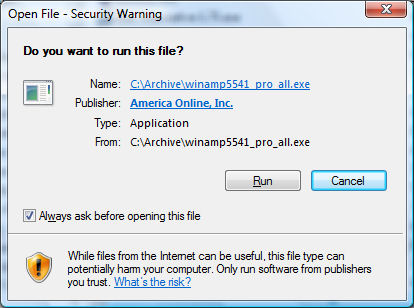
Apparently with a recent “security” update pushed out by Microsoft, it now causes ANY file you download from the internet and try and open to pop up with a security warning like this one:

Good LORD this has got to be the most OBNOXIOUS WINDOWS UPDATE EVER.  What on god’s green Earth was Microsoft thinking when they pushed this one out?!  Shut the hell up, I know what I downloaded.  I have updated virus protection (I <3 NOD32), so leave me the hell alone about it and let me run what the fuck I want to!  I don’t need you baby sitting my downloaded files as I’m not a moron, thanks for assuming I am though MS.

It finally pushed me over the edge today when I saw this warning pop-up for the 9000th time in one day.  I had to find a way to make it go away and never come back, as unchecking that box simply applies to that 1 file, not ALL files as you might think it would.

Read More

Have Vista? Installed SP1? Want ~800mb disk space back?

Attention: This content is 16 years old. Please keep its age in mind while reading as its contents may now be outdated or inaccurate.

If you are running Windows Vista and have installed Service Pack 1 (SP1), you can gain around 800mb of disk space back.

When you install SP1, it backs up all the files in case you want to remove SP1.  But chances are pretty good that once you have SP1 installed you really have no reason to ever install it, so it is safe to remove those backup files.

It’s pretty simple.  Press Winkey+R to pull up a run dialog.  Type in Vsp1cln and press enter.

A prompt will confirm deleted the files.  Enter y obviously and it goes to work removing these useless backup files.

Enjoy reclaiming a bit of your hard drive space!

Vista File Extension Manager (Mounting ISO Revision)

Attention: This content is 16 years old. Please keep its age in mind while reading as its contents may now be outdated or inaccurate.

In my article here I showed you how to make ISO, BIN, and other CD/DVD Image files mountable by simply double clicking them in Vista.

To accomplish this I used a tool call Creative Elements Power Tools.  It worked fine for what I was doing at the time.

Fastfoward 45 days or more later… I go back to use that tool again to manage some other file extensions in Vista only to discover the tool is now expired and they want $18 to register it.  After promptly uninstalling that bullcrap I went on the hunt for a 100% definitely free tool that would accomplish the same task.

I stumbled upon a freeware tool called File Type Manager that will allow you to manage file types to your heart’s content.  I actually like this tool a bit more.  It’s more “power-user’ish” which I appreciate.  No fluff and stuff bullshit, just a straight-up tool to manage what you are wanting to manage.

Even though it was written in 2001 apparently, it still works perfect in Vista!  Just note that when installing it you will get some warnings about it trying to install old versions of files.  Just be sure you keep the current versions of the files you have on your machine and you will be just fine.

That’s all for this post.  Just wanted to update anyone who may have used that tool in my other post and pass along a free tool I found.

Tutorial: Mounting CD/DVD Images with Daemon tools by double clicking the file in Vista

Attention: This content is 16 years old. Please keep its age in mind while reading as its contents may now be outdated or inaccurate.

First off, I’ll say I know there is a plugin that sort of does this for Daemon, but it does not associate all the file types and there is no way to add additional types to it and is quite buggy, as well as doing other shit I didn’t like.

I’d been wanting to do this for some time now to simply make it more efficient to mount CD/DVD images with Daemon Tools.  I always felt going through the DT menu from the tray icon was a giant pain in the butt.

In XP this process is different, and actually easier… but at the last LAN I was at every one was one Vista except for one person, so I’m not going to bother with XP instructions… although you can probably figure out how to do it in XP from these.

Vista’s dumb-down feature creates another casualty when it comes to trying to manually edit file type associations.  There is basically no way to do it.  You can change which program a file opens with, but it has to be a program… there is no way to input custom things for file types.  F-you Microsoft.  How do you REMOVE features from your flag ship OS?  Anyway…

Read More